What makes your own product even more personal and professional than a label with your own logo? You can easily design your own label with logo by following the steps on the web page. Are you still unsure about what the steps are? Then we are happy to help with this explanation. It’s quite a long blog, because we want to explain everything as complete as possible, but of course you can also go directly to the step where you need help!
Your own logo
In order to start designing your own label, you will need a ready-to-use, custom logo, consisting of a maximum of 2 colors (1 ground color and 1 text/figure color).
You can design a logo yourself, or hire a logo designer for that project. Nominette is specialized in weaving labels in taffeta quality. We are not graphic designers and therefore cannot design logos. You can upload the file with your ready-to-use logo on our site. It is important that this is a logo without copyright, or one that you own the rights to. To upload, your file must be in one of the accepted file formats for our website. This can be a tif, eps, psd, jpg, gif, png, bmp or svg file, and the file size cannot exceed 4000 pixels. Unfortunately a PDF file does not work.
Step 1: Choose a label width
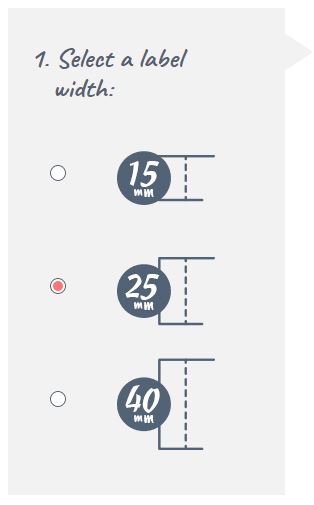
Once you have your own logo file, start at step 1 on the website by choosing the label width. The label width determines what width the band will get from your label. You can choose between the label width 15mm, 25mm or 40mm. If you have a very fine, detailed logo, we recommend that you choose the highest possible label width. This ensures that your logo appears on your label as clearly as possible. Good to know is that each label width has its own label length. The dimensions of each label are listed in the simulation under step 4, in the turquoise frame. We work with standard, fixed dimensions, so these cannot be adjusted.
Step 2: Choose a landscape or portrait label
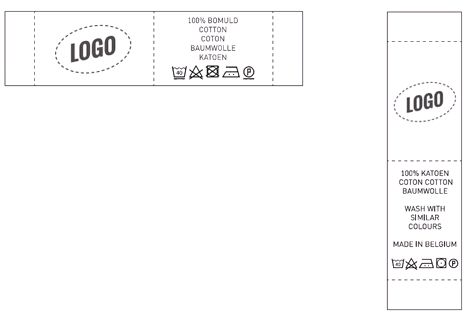
In this step you choose, as the name implies, for a landscape or a portrait label. Your logo is always displayed horizontally on the label.
Step 3: Choose your type of label
Depending on whether you chose a portrait or landscape label in step 2, you can choose different types of labels in step 3. We will explain these further below.
End fold or middle fold
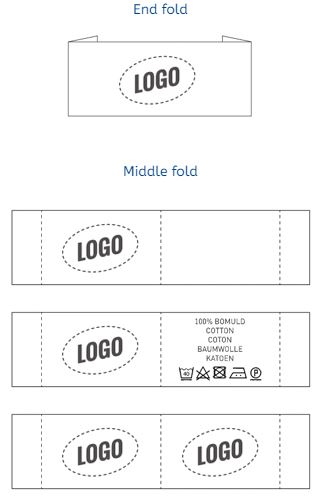
All our labels are supplied on a roll. You cut them on the indicated cutting line. For a label with an end fold, fold the ends of the label after cutting it. After folding, the label can be stitched on the left and right side.
This way the label will lie flat on the garment. An end fold label is often used on the back of a garment, or for stitching onto a garment.

A label with a middle fold is often processed in a seam of a product/garment, for example on the side of a pillowcase. After you have folded the label in the middle (for example with the help of an iron) you can slide the label a bit into the open seam. Then the seam is stitched closed with the label in between. With a label with a middle fold, it is important that you insert the label into your product before you close the seam completely.
Landscape, horizontal label
With a landscape label you can choose from 4 types of labels, which are listed in the drop-down menu at step 3. One type of landscape label with an end fold, or 3 types of labels with a centre fold. With a horizontal label with centre fold you can choose your logo on one side (the left side) and the other side blank. You can choose your logo on the left side and your own text with washing symbols on the other side, or you can choose a label with your logo placed on both sides. This will be exactly the same logo, 2 different logos on one label is unfortunately not possible at Nominette, but this is possible at our sister company EE Label Factory.
Portrait, vertical label
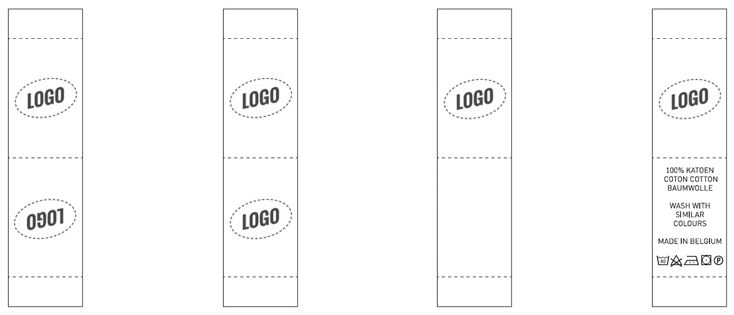
Our standing, vertical labels are only available with centre fold. For this type of label you can choose from 4 options (listed in the drop-down menu of step 3); your logo mirrored on both sides of the label, your logo non-mirrored on both sides of the label, your logo on one side of the label and your logo on one side with text and washing symbols on the other side of the label.
Washing symbols
If you choose the type of label with washing symbols and your own text on the other side of your label, you can enter the text you want on this side in step 5, after uploading your logo. Often text is placed here such as “handmade by … in …” or the composition of the fabrics of your product. These text lines have a maximum number of characters per text line. The font is also fixed and cannot be changed.
In step 6 you then choose the washing symbols that apply to your product. If you choose washing symbols, it is legally required to enter all 5 washing symbols. You cannot therefore choose to mention one washing symbol, for example only the symbol for ironing. You will then have to state all washing symbols, with the specifications that apply to your product. If certain washing symbols do not apply, select the relevant symbol with the cross through it.

Step 4: Upload your logo
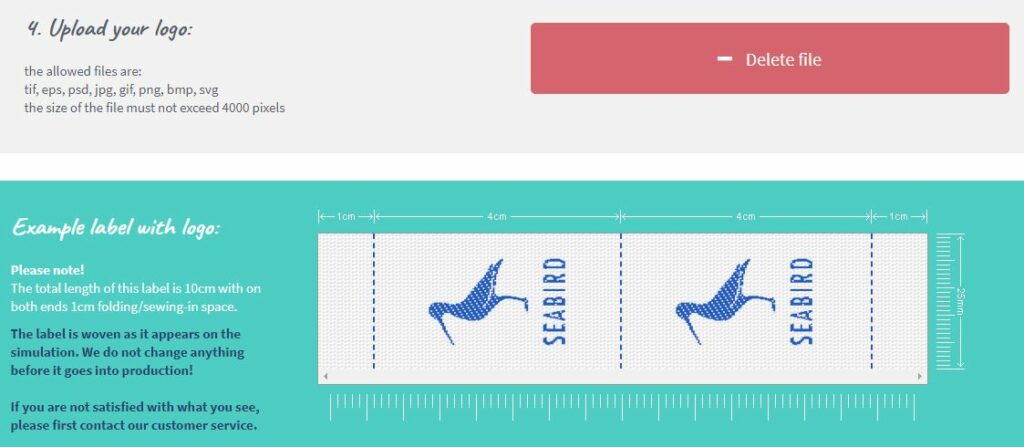
After choosing your label type, you can upload your logo file in step 4. The file must be in one of the allowed file formats. This can be a tif, eps, psd, jpg, gif, png, bmp or svg file, and the file size cannot exceed 4000 pixels. A PDF file does not work. Once you have uploaded your file, your logo will appear in the simulation within a few moments (turquoise frame). It may be that your logo is not immediately displayed in the correct colors after uploading. Don’t panic, later on, at steps 7 and 8 you choose your desired colors.
Help, something isn’t right!
It is very important to check the simulation in the turquoise frame. What you see here will be woven exactly like this. Do you see anything in the simulation that doesn’t quite match your logo? Or do you only see a colored area? Then there may be something wrong with your logo file.
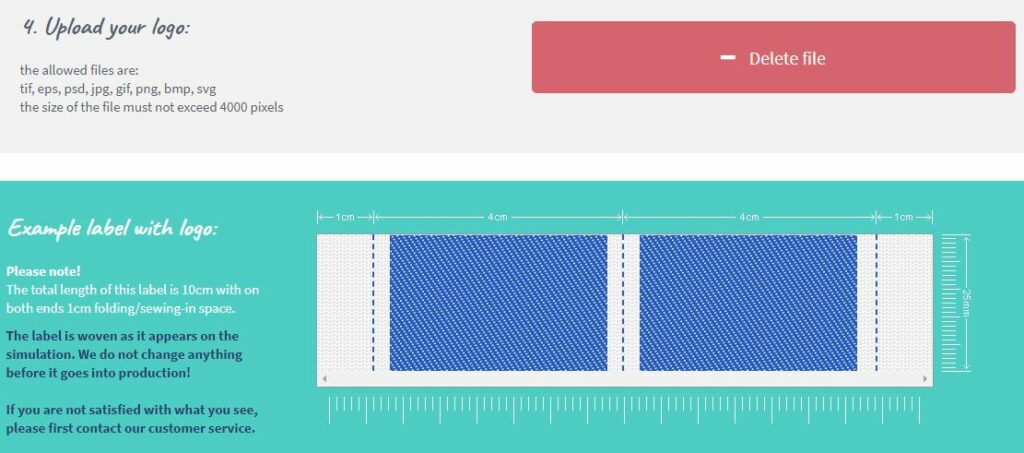
For example, is your logo displayed too small on the label in the simulation? This may be because there is too much empty space around your logo. We advise you to cut away the empty space around your logo / file as much as possible before uploading it.
If your logo is still not legible in the simulation after that, your logo may be too detailed for the label height you have chosen. Then choose a larger label, simplify your logo or make the lines in your logo bolder. It is also possible that the contrast in your logo is too low, so that your logo is not recognised. Then increase the contrast in your logo file, and upload your logo again. You can also convert your file to black and white, so that the contrast is stronger. After uploading, choose one of our standard colors in steps 7 and 8.

Step 5 and 6: Optional – Choose your text and washing symbols
These steps are optional, and you only need to complete these, if you have chosen the type of label “center fold with text and washing symbols on the other side”. For an explanation about this specific label, see step 3 under “washing symbols”.
Step 7 and 8: choose your ground and text/logo color
After correctly uploading your logo (and optionally completing steps 5 and 6), choose the desired background color in step 7, and your text / symbol color in step 8. Nominette weaves in 2 colors, and with a set of standard, own colors. There is an assortment of base colors and an assortment of text / symbol colors. Unfortunately, these colors cannot be reversed. This has to do with the weaving technique. So a ground color cannot be selected as the text color, and vice versa.

Almost finished
After choosing the colors, your label design is almost ready. Below the color choice you choose the number of pieces you want. Nominette weaves from 100 pieces per design and color combination. Less than 100 pieces is unfortunately not possible. If you have a promotional code, enter it below the choice of quantity, and click “click and order”.

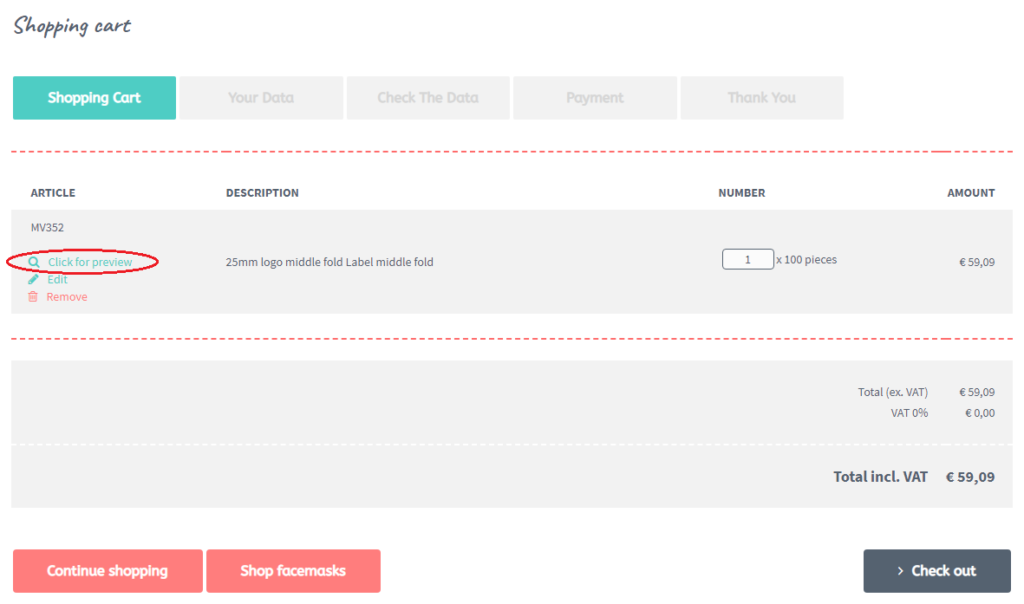
You will then be taken to the page of your shopping cart. We strongly recommend that you check your order carefully by clicking “click here for a preview”. Now you will see the simulation of your order again and you can check whether everything went well. If that is in order, you can complete the order by entering your details and completing the payment.
Done!
After finalising the order, you will receive an order confirmation via mail within a few minutes. In the attachment of this e-mail you will find the invoice, which contains the simulation again. Please double check these carefully as well. Your order will now automatically proceed to production.
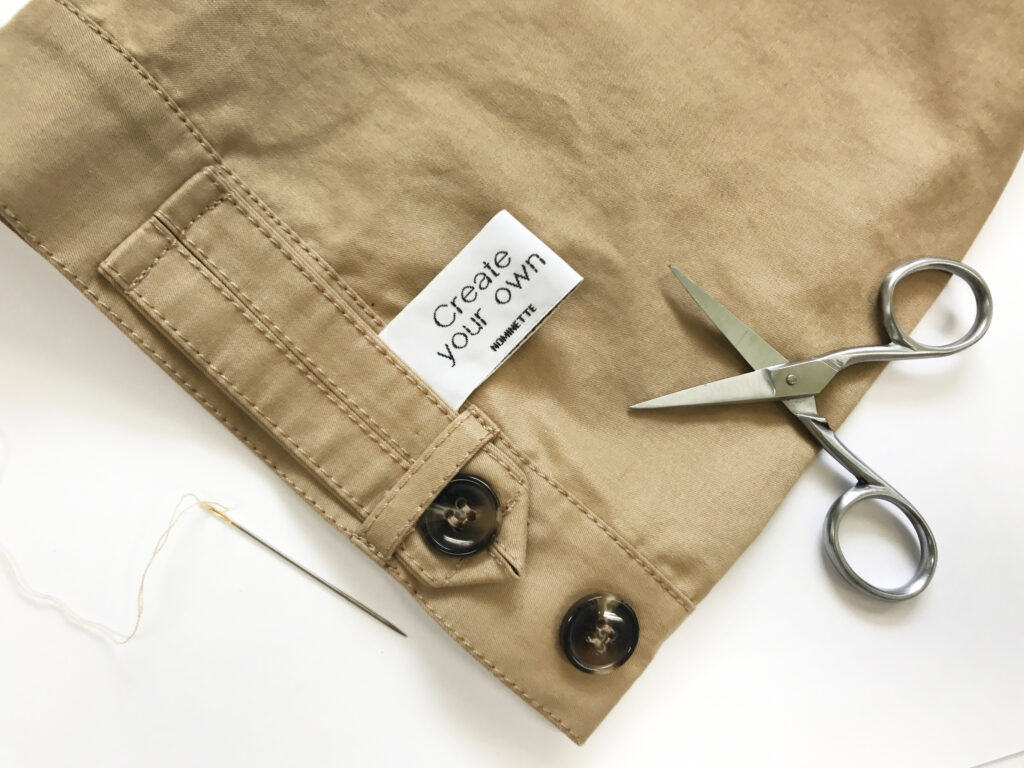
If, after reading this blog, you still have questions about designing a label with logo, please contact our customer service before placing the order. Unfortunately, we cannot change an order that is already in production. Did you not receive an email with order confirmation from us? Please do not hesitate to contact us. Are you looking for a different type of label than a label with a logo? In the blog ‘What kind of label do I choose?’ we explain all our types of labels.
We hope this manual has helped you order your labels, and we hope you enjoy creating your own logo labels!
